Self-Hosting a Ghost Blog on Your Homelab Using Unraid + Docker


I've been meaning to post my thoughts and ideas in blog format; not necessarily so that I can educate/entertain anyone (although it's great if I'm somehow accidentally achieving that), but more so that I can perhaps document things I can later come back to. Seems only fitting I should create a post to outline how I got the blog up and running.
Getting a personal domain
I've always wanted my very own little corner of the web; fahim.ca seemed like a natural choice - I'm Canadian and it's my first name after all. The problem was that at the time it was already registered to a popular mechanical engineering professor at the University of Ottawa. I was a computer engineering undergraduate so I never directly interacted with him, but did occasionally see him in the hallways of Colonel By Hall. Unfortunately, he passed away and his site wasn't being maintained anymore. I vaguely remember paying one of the broker sites to try buying the domain, but it seems there was nothing but crickets on the other end
We have been unsuccessful in furthering negotiations with the seller for domain FAHIM.CA as they have not responded after several offers for the domain.
Ok fine; so I pretty much just gave up and moved on with my life. Except, a couple of years later - just checked on a whim, and turns out the site was available now (presumably the prior registration had finally expired and was up for grabs).
Ended up registering it with 10dollar.ca (which is now rebranded as grape.ca), and just had the domain parked for years till I started this blog last week.
Probably was frustrating for any other Fahim's out there who wanted to snag the domain especially seeing I had been keeping it dormant - a couple had even reached out to purchase it (seems like they were able to get a hold of me indirectly through the Canadian Internet Registration Authority's internal message delivery service - while DNS records do have my personal information redacted, I suppose there still needs to be a way for folks to reach the registrant)
Purchase Domain
Hello, I hope you're doing well. I noticed that the domain has not had a website in the last few years and am wondering if I can purchase it from you. My name is Fahim hence why I want to buy the domain. If you would like to discuss this over the phone, please feel free to text/call/whatsapp me or email me if it's easier. Thank you!
Sorry bro, I ain't letting it go 😀
Why self-host?
Self-hosting is the practice of running and maintaining a website or service using a private web server, instead of using a service outside of someone's control. Self-hosting allows users to have more control over their data, privacy, and computing infrastructure, as well as potentially saving costs and improving skills.
I had been tempted to go with something like wordpress.com's free tier, but that would serve ads and I didn't want to deal with that. And since I have no idea if I even want to keep blogging, it made no sense for me to pay for the higher tiers. A couple of neurons in my brain got me thinking - I could host my wordpress.org site! Some more research eventually led me to Ghost - I appreciated its relative simplicity and ease. Again, I'm not interested in paying for anything (nor requiring any viewers/lurkers to pay), so went with the self-hosted route.
The biggest worry about self-hosting I've had is security - I'm opening external traffic into my internal network. As I'll eventually outline below, there are a few mitigating steps to overcome this.
A quick introduction to Unraid
Long story short, I had a spare Dell tower, and quite a hodgepodge of spare 8TB and 3TB hard disk drives, and I just wanted to start up a Plex media server I could use to consume media locally on my network and (securely) share with some close friends. Originally I'd have Plex running off my desktop machine, but eventually decided to get a dedicated device that would be up and running 24/7 from my basement.
I'm hoping I don't trigger a religious debate of Unraid versus TrueNAS (scale or core) versus just running your Ubuntu/Debian server versus getting a pre-built NAS from the likes of Synology or QNAP. I was tempted to try out TrueNAS scale (free), but at the end of the day decided that because I had a set of drives that were of different sizes/capacities, setting up a couple of ZFS vdevs was more hassle than I was willing to deal with.
| FEATURE | UNRAID | TRUENAS |
|---|---|---|
| File System | XFS | ZFS, with built-in snapshots & RAIDZ |
| Performance | Good, less resource-intensive | Higher, but more resource-intensive |
| Data Protection | Parity drive-based | RAIDZ-based |
| Usability | Easy, flexible | More complex, advanced controls |
| VM Support | Strong support for Docker & VMs | Less emphasis on Docker & VMs, but available with TrueNAS Scale. |
| Hardware Requirements | More flexible, less demanding | More demanding, especially on larger arrays |
| Ideal Use Case | Home servers | Enterprise-grade applications |
Went with UnRaid, plunked down some cash for the Plus license, and have been a very satisfied customer.
Unraid Docker Setup
Ensure Docker is enabled under Settings > System Settings > Docker

Next, I'd recommend enabling the Community Applications plugin. Instructions can be found here

Since I prefer using docker-compose to create stacks of related apps (instead of using Unraid's default single app view), we also need to get the docker composer manager plugin

If you're looking for some more info on using setting it up, this is a good resource

Production mode Ghost stack
Once you've got a docker-compose manager up and running, create a new stack and edit the docker-compose.yml file similar to the snippet below. The UI editor is fairly rudimentary, but it works. Command-line editing via nano/vi is fine too.
version: '3.8'
services:
  ghost-db:
    image: 'mysql:8'
    container_name: ghost-db
    security_opt:
      - 'seccomp:unconfined'
    restart: always
    command: '--default-authentication-plugin=mysql_native_password'
    ports:
      - '3306:3306'
    environment:
      MYSQL_ROOT_PASSWORD: Password123
    volumes:
      - '/mnt/user/appdata/ghost/mysql:/var/lib/mysql'
  ghost-server:
    image: 'ghost:latest'
    container_name: ghost-server
    cap_add:
      - CAP_SYS_NICE
    security_opt:
      - 'seccomp:unconfined'
    restart: always
    ports:
      - '2368:2368'
    depends_on:
      - ghost-db
    environment:
      url: 'https://fahim.ca'
      database__client: mysql
      database__connection__host: ghost-db
      database__connection__user: root
      database__connection__password: Password123
      database__connection__database: ghost
    volumes:
      - '/mnt/user/appdata/ghost/content:/var/lib/ghost/content'
Once you've got the composition up - you should be able to view your site using something like
https://unraidserver:2368/ghostThe next step, of course, would be to expose your ghost instance externally to the world.
Cloudflare
There's probably more than one way to approach this, but I found the following steps to work well for me - we will be focusing on how to use Cloudflare as our DNS or Domain Name Server. Afterwards, we will take a look at some basic Cloudflare tools to help keep your website from being attacked by bots and malicious attackers.
Create a Cloudflare account
Cloudflare allows us to use their name servers so we can obfuscate our home IP. We will also have a wide variety of security tools at our disposal all for free. Register an account at Cloudflare. It's free and well worth your while. You will need to verify your email so be sure to use an email you have access to.
There are, of course, paid plans with more bells and whistles https://www.cloudflare.com/plans/
Add your site/domain to Cloudflare
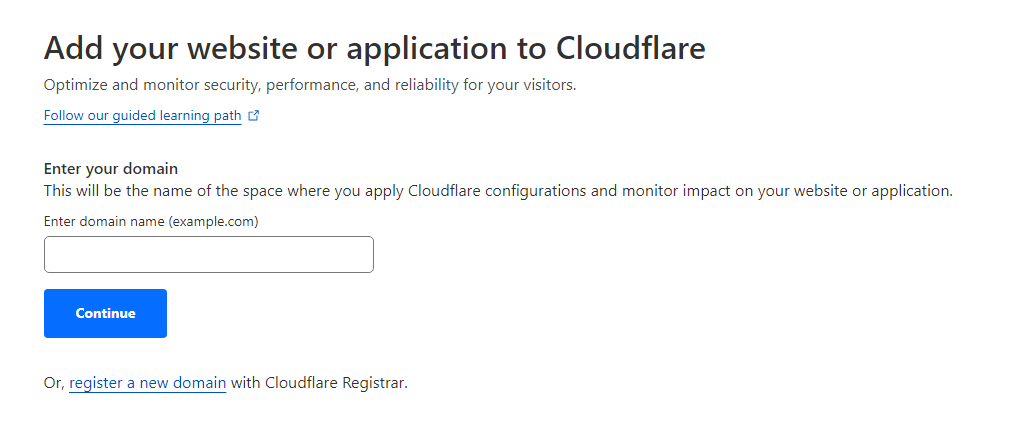
Once you get logged in and verify your email, you can now add your domain to Cloudflare. Click on Add a site

And follow along the steps. I selected the free tier, of course.
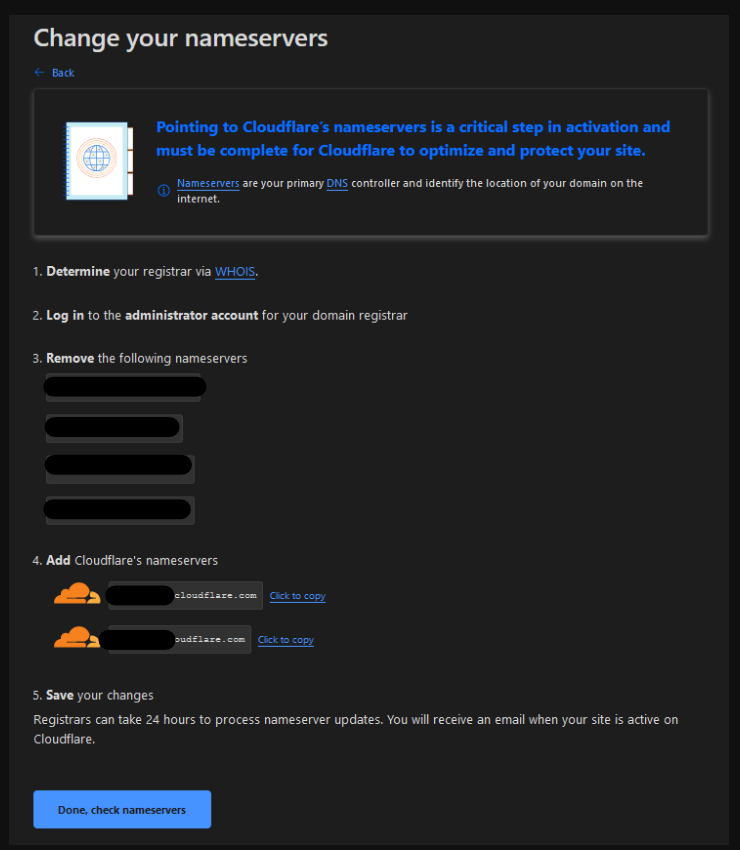
Since I bought my domains from grape.ca, I will need to replace the placeholder grape.ca name servers with the provided Cloudflare name servers as seen below.
This is what it looks like on the grape.ca end of things; of course, your registrar settings and look and feel are likely to be different but similar.
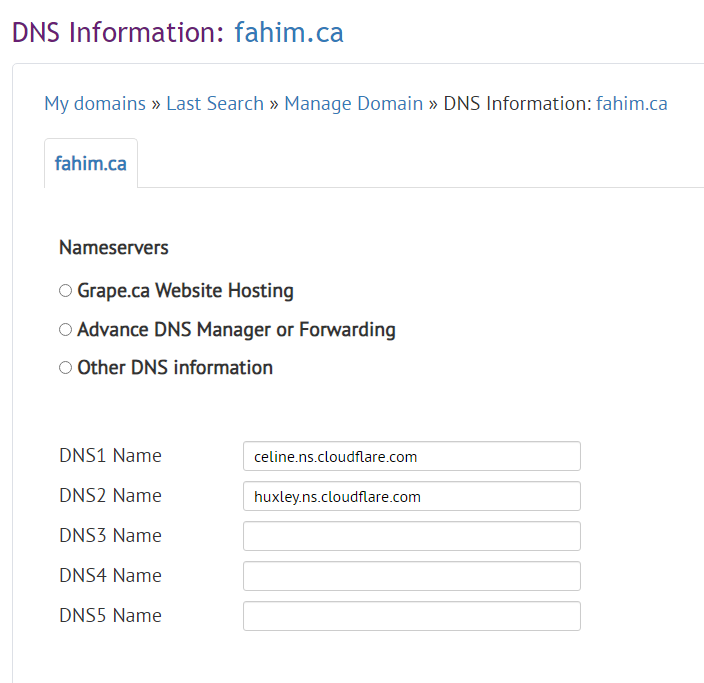
Submit the changes then go back to the Cloudflare dashboard.
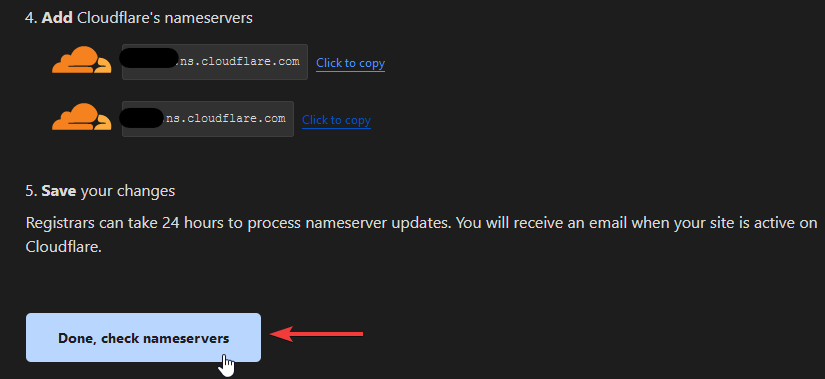
Now you can click the Done, check nameservers button and complete the quick start guide. It's a good idea to enable Always use HTTPS and then leave the remaining parameters at the default values for now.
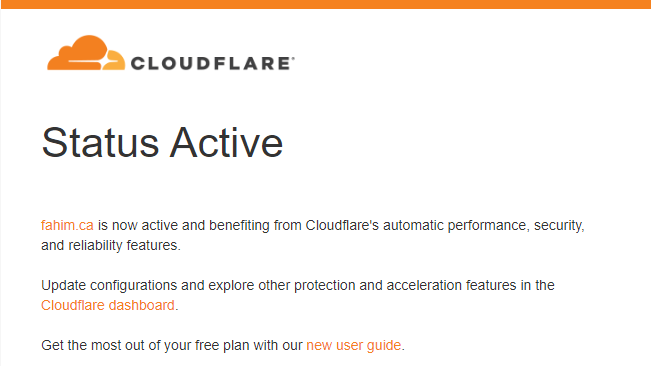
You will be taken back to the name server setup page at the end of the guide. You will have to wait about 10-15 minutes depending where you live for Cloudflare to propagate the new name servers. You will get an email when it has been completed so be patient! You will eventually get this email to know your domain was successfully activated on Cloudflare. Like me, you could also periodically spam trying to visit your domain in a web browser to see if you're being redirected to Cloudflare yet.
Cloudflare Zero Trust
At this point, let's do a quick status update:
- we have a ghost instance running on our local LAN
- Cloudflare is now our DNS provider
What we need to now do is get Cloudflared tunnel client to redirect any traffic directed at our domain to be routed to our ghost server instance - without giving away our network coordinates, of course! To do this we will utilize the Zero Trust Access Tunnel and install a Cloudflared agent using Docker.
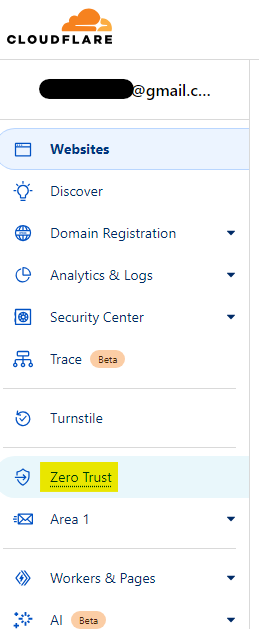
On your main Cloudflare dashboard, you will see a link on the left side panel called Zero Trust
The first thing we want to do is set up our access tunnel using Docker. This will allow Cloudflare to pass traffic to your domain even if your home IP address changes. This will also obfuscate your home IP address which is probably a good thing.
Click on Access on the left side to expand the menu, then click Tunnels. This will prompt you to select a plan and again, we can choose the free plan but you will still be required to add a payment option. I connected my PayPal account and it works great; I've been assured that no payments will be made and this step is a mere formality.
Once you get your payment gateway connected, you can create your first tunnel. I choose the Docker environment.
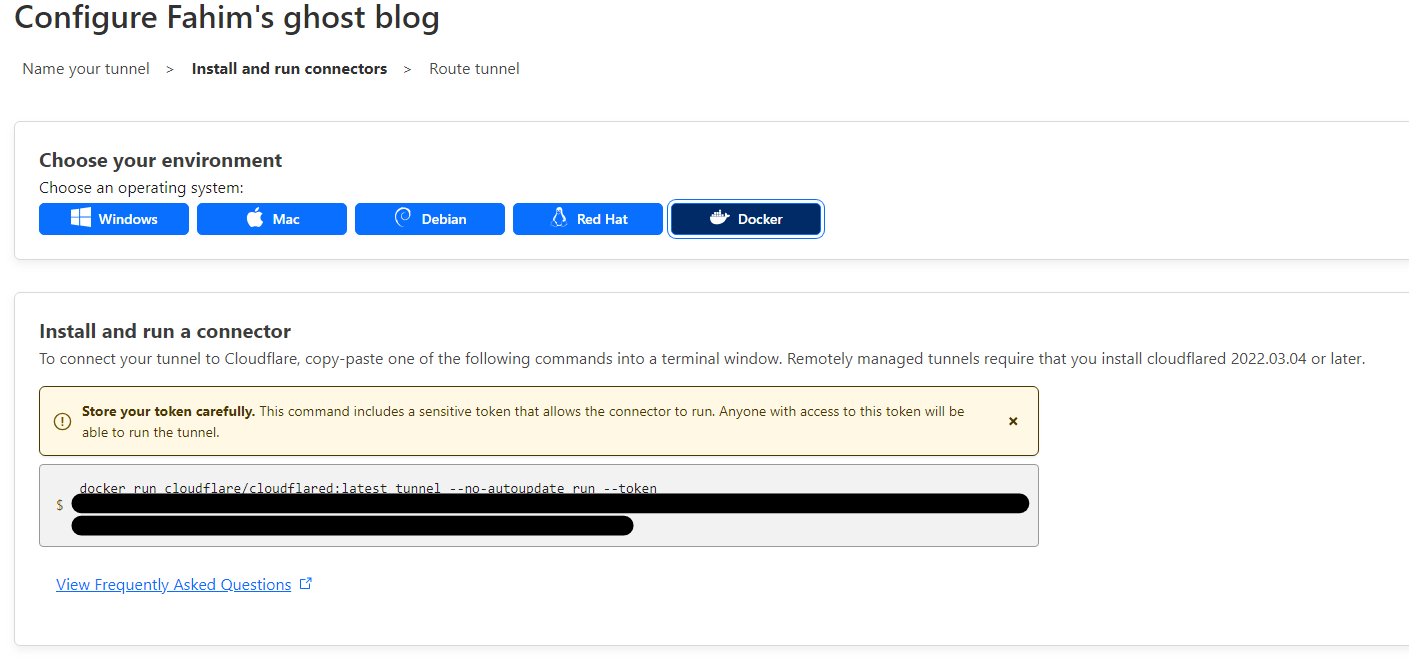
Don't share this command because this has a unique token ID that ties to your account with Cloudflare. If this Docker container is not running, your website will not load properly.
Now all that's left to do is add your Public Hostname
Choose your domain from the dropdown menu, add the Unraid host IP and port of the Ghost instance (e.g. http://unraidserver:2368) then select HTTP as the service type. Hit Save hostname and you're done... with this part 😉
Cloudflared Tunnel Client
Back in Unraid, you could
- take the
docker runcommand from the previous Cloudflare setup to install and run the tunnel connector - alternatively, go back and add it to the docker-compose stack, or
- install the tunnel client by searching for the docker template in Unraid's app list
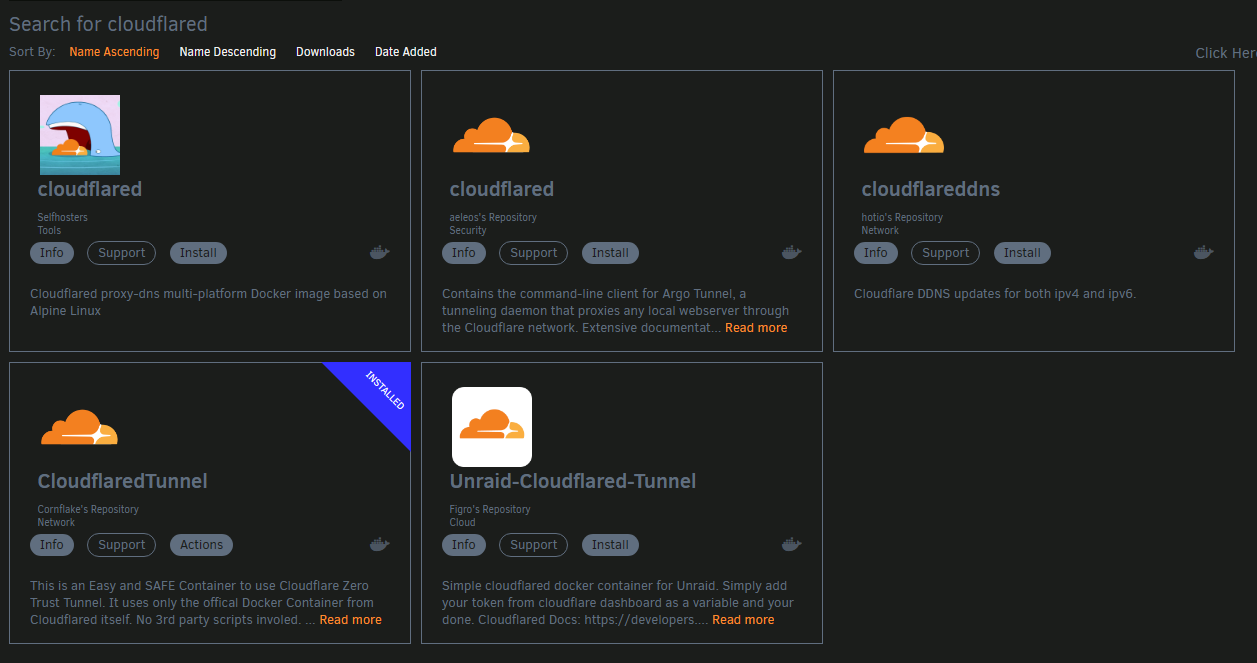
For the sake of variety, I'll go with the last option. When you do search for cloudflared you will be presented with a few options. I went with the CloudflaredTunnel template. Go ahead and install it
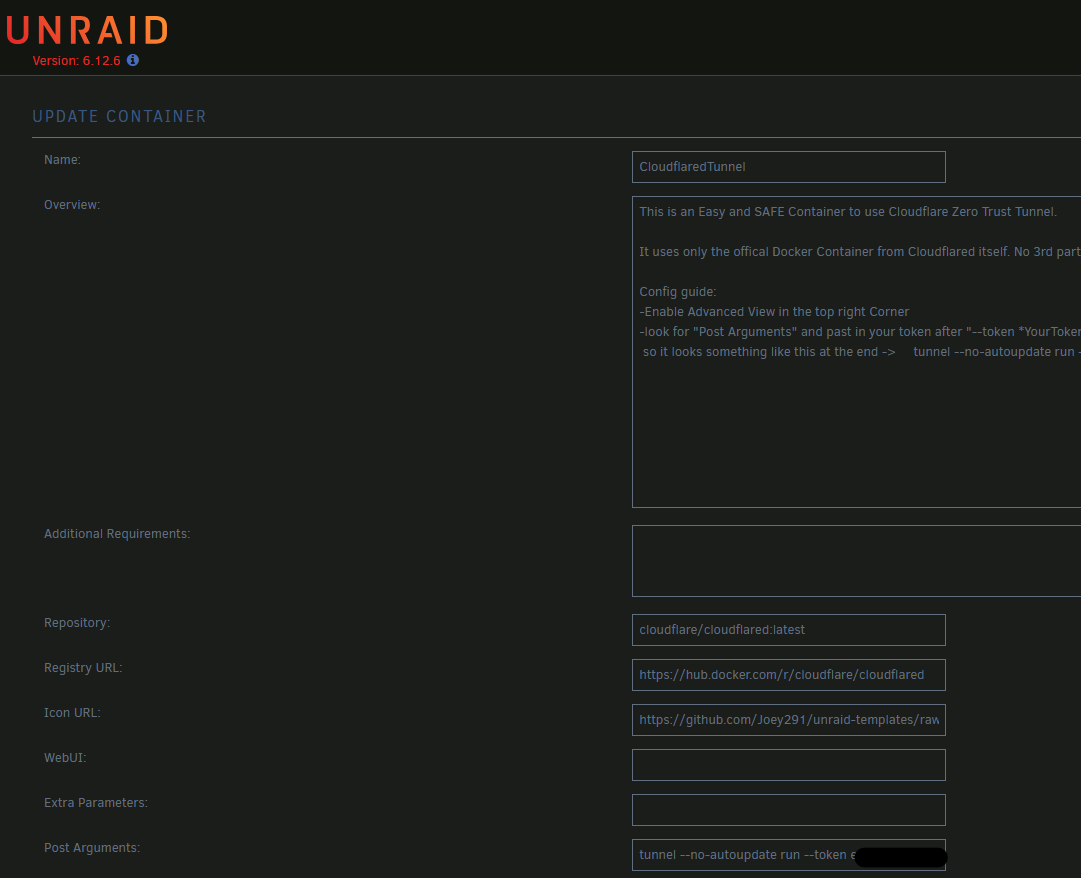
Enable Advanced View in the top right corner and look for Post Arguments and paste in your Cloudflare token after --token YourTokenHere. Click Apply.
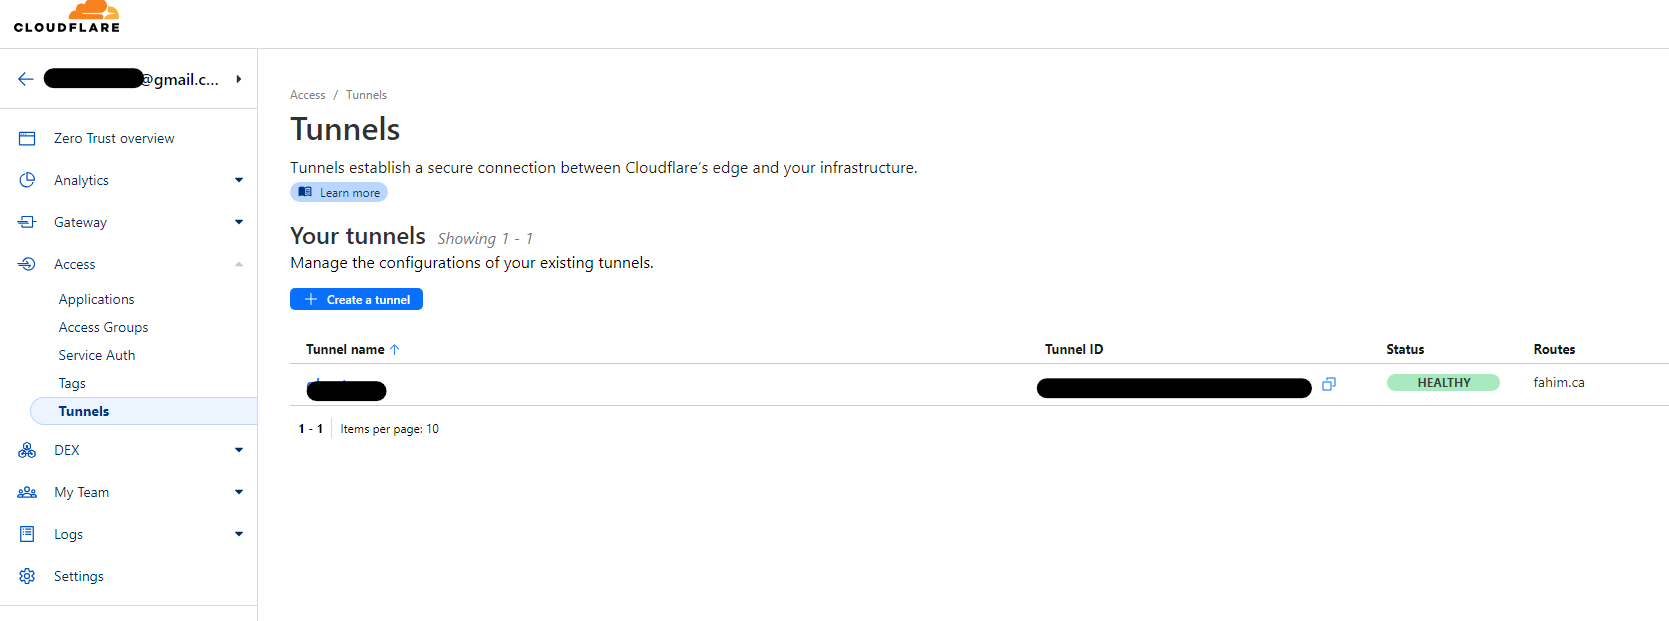
If all went well, back in the Cloudflare Zero Trust console, under Access > Tunnels, you should see your tunnel in a HEALTHY state.
A few more Cloudflare settings
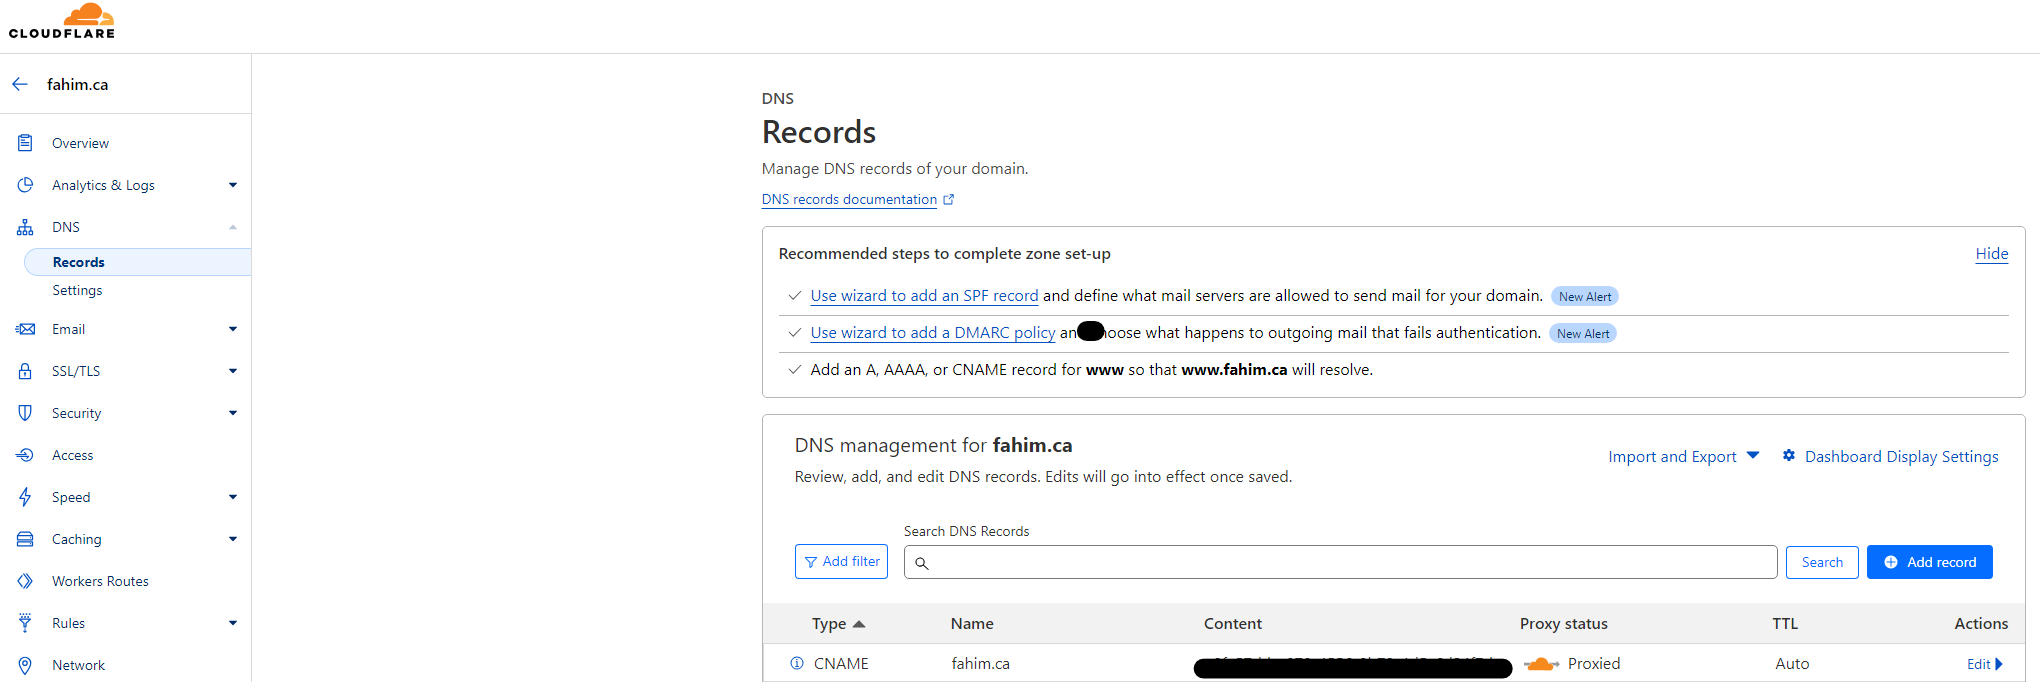
By now, you should see updated DNS records in your website's Cloudflare dashboard.
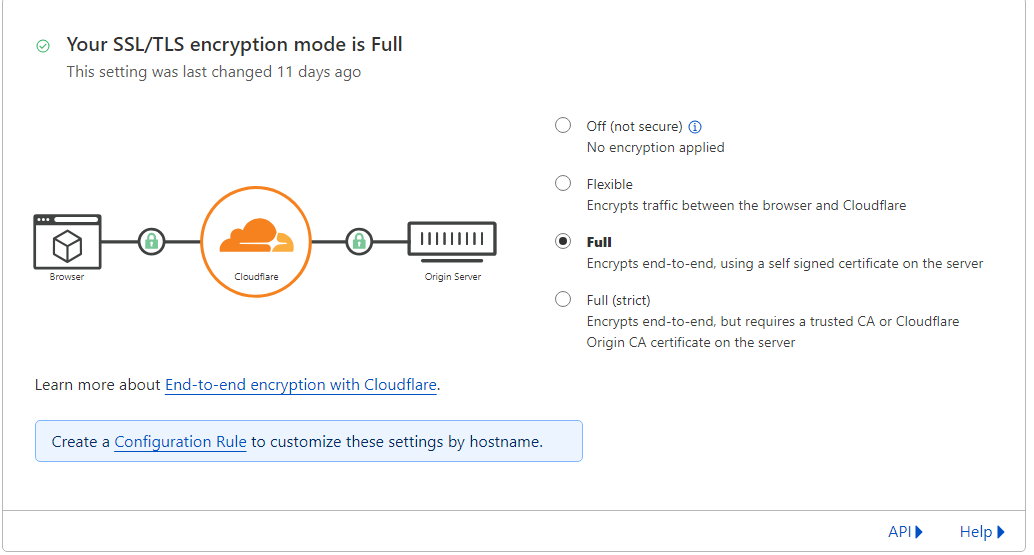
Under SSL/TLS, there are a few settings worth enabling. I went with Full encryption mode, by the way.
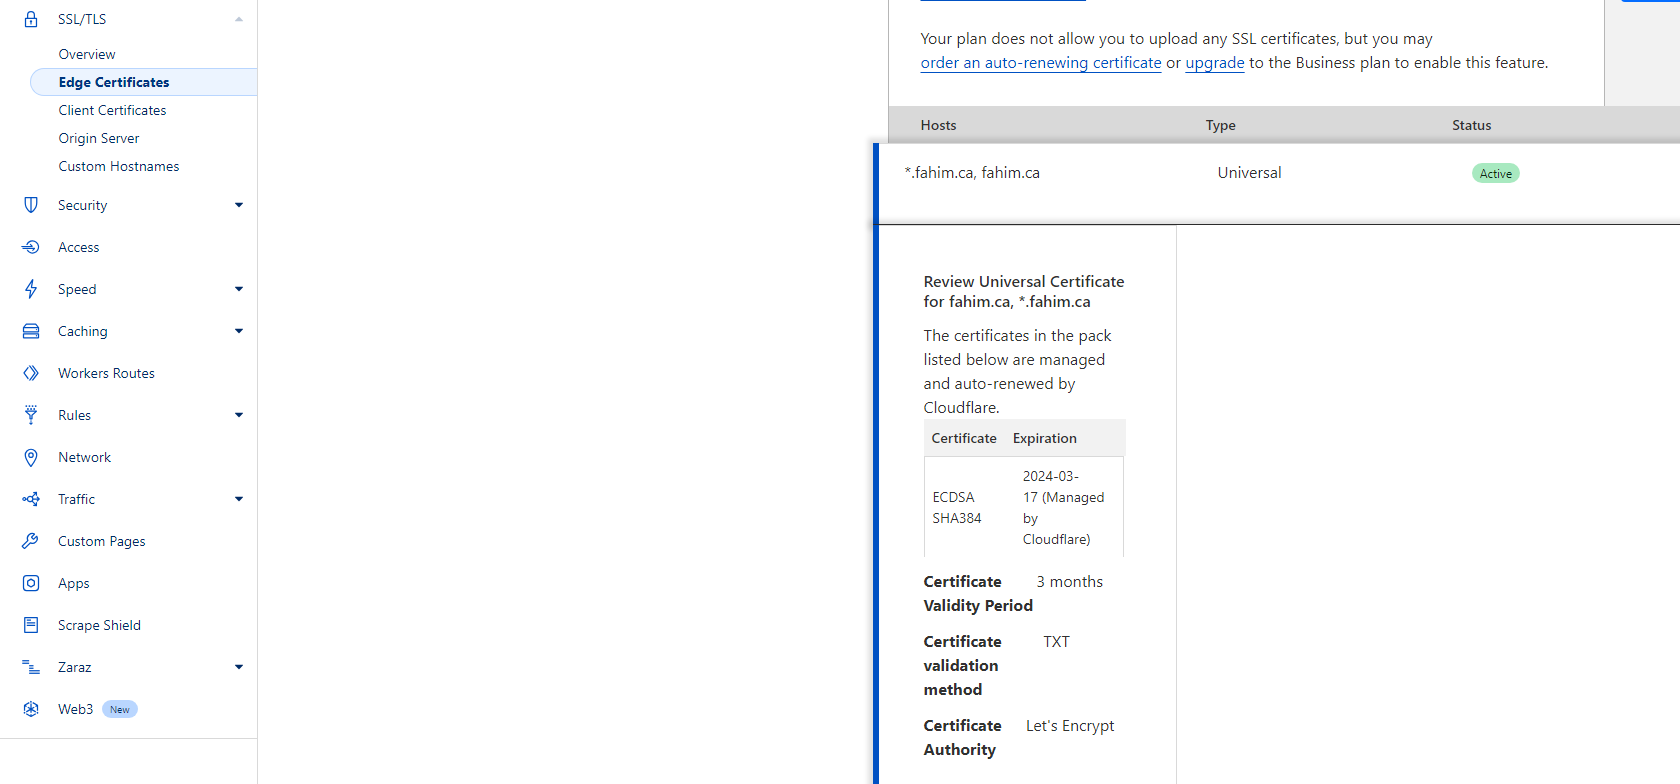
Under Edge Certificates you should see a free Universal SSL certificate created (this is provided by Let's Encrypt and is auto-renewed).
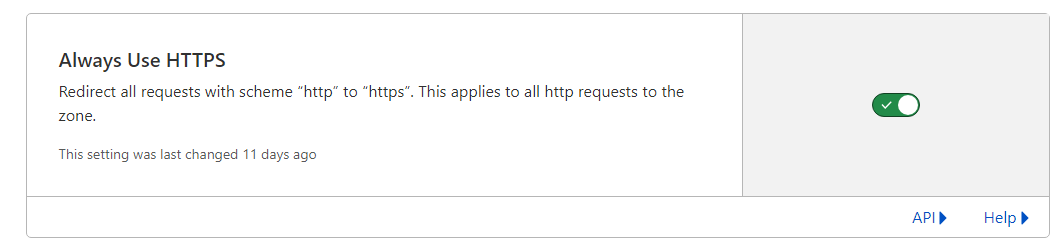
I enabled Always Use HTTPS
I also prefer requiring the latest TLS version. Sorry to anybody still using Internet Explorer; maybe the folks at AT&T 😏

The Grand Finale
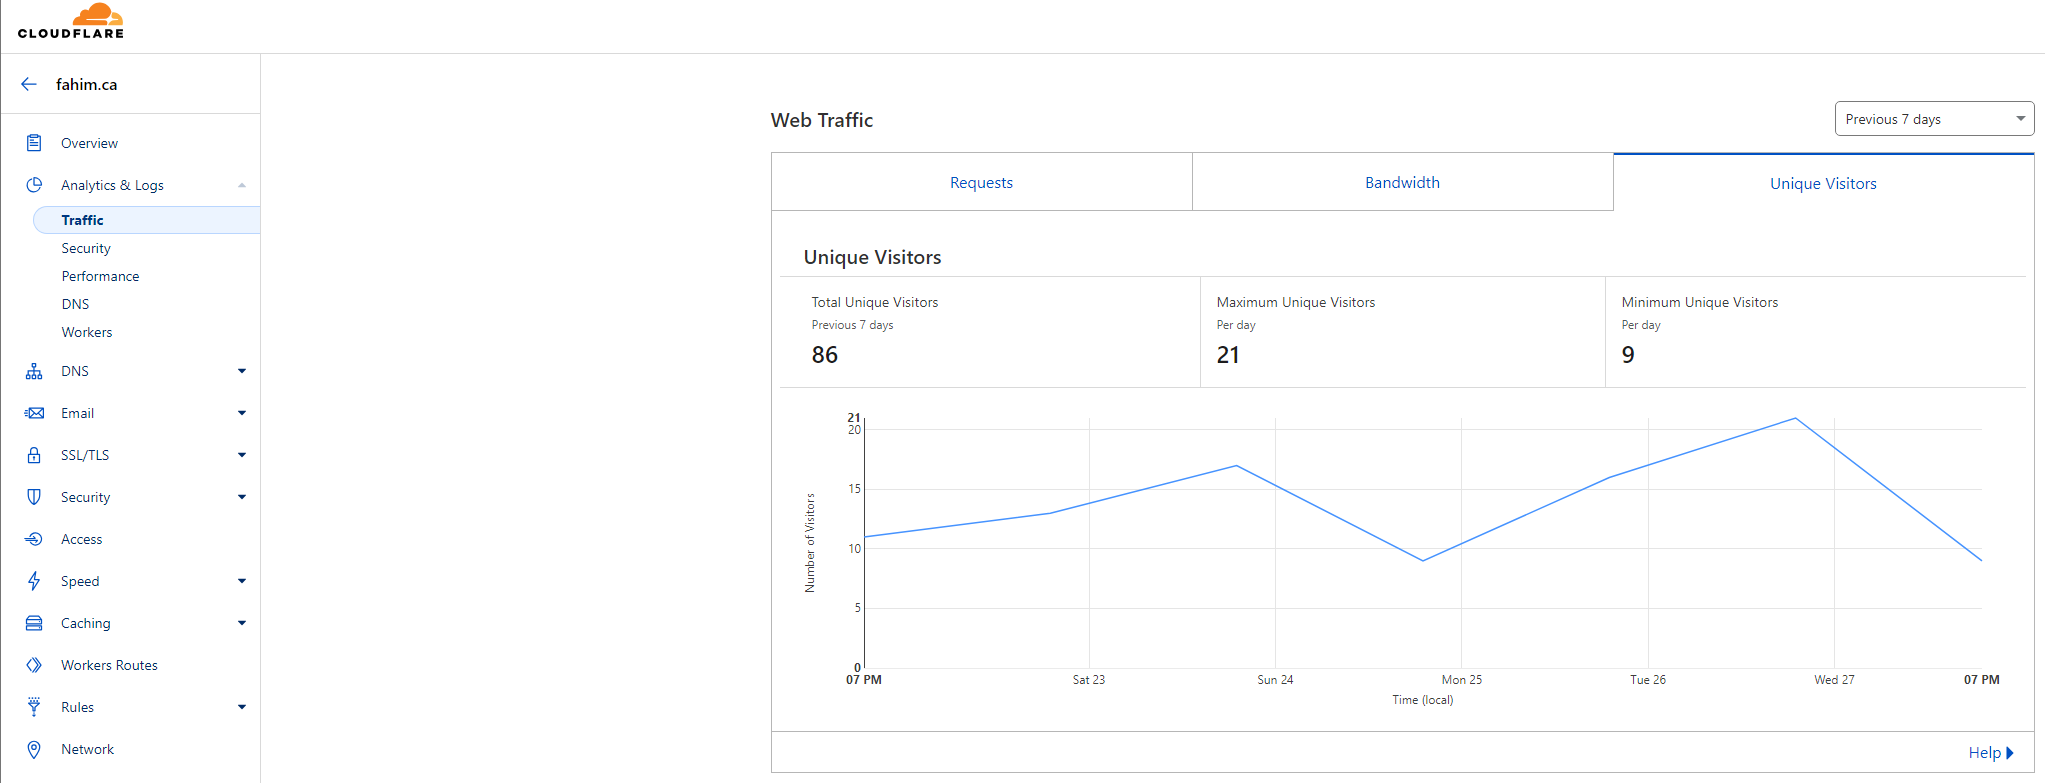
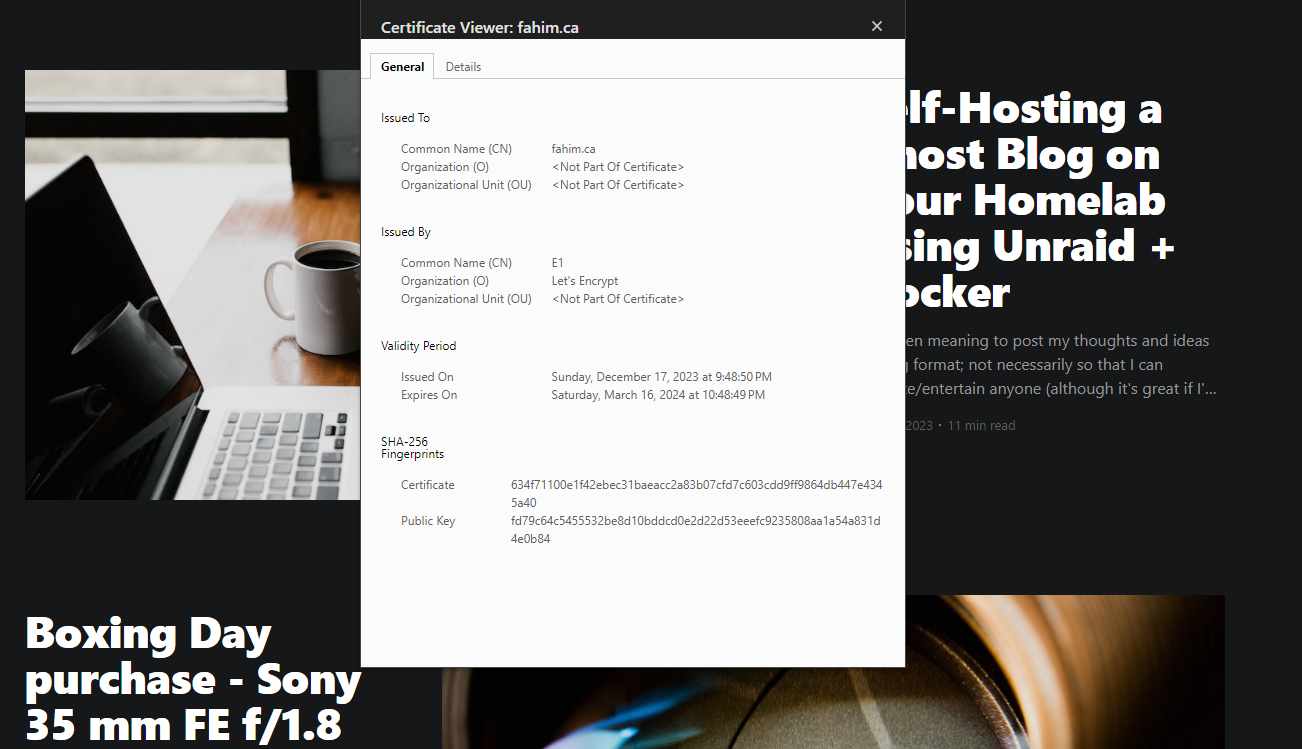
Your site should now be available! Your IP is obfuscated and traffic is encrypted.
If you look around the Cloudflare dashboard you can also glean some traffic analytics.